1. Introduction #
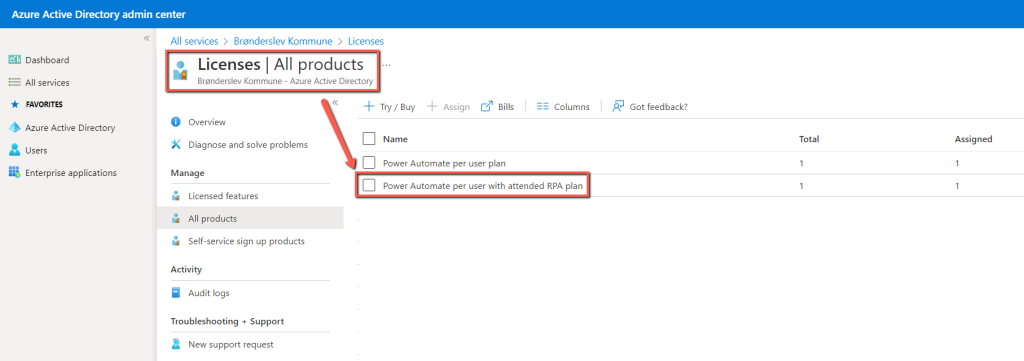
Before you get started, you need to have your licenses ready. At a minimum, you need one Power Automate per user w/attended RPA license per developer / programmer, and one Power Automate Unattended RPA add-on , per unattended RPA robot you want ( similar to solobot from softomotive ).
The following guide goes through the technical setup of Power Automate , and not the actual use of it.
| Name | Note | Link |
| Rights | Overview of what each security role provides access to in the Power Automate Environment | https://learn.microsoft.com/en-us/power-platform/admin/database-security |
| Installation | Installing the app for Windows | https://learn.microsoft.com/en-us/power-automate/desktop-flows/install |
| Machine | All about machines and how to handle them | https://learn.microsoft.com/en-us/power-automate/desktop-flows/manage-machines |
| Power Automate introduction | Should be read before you start setting up your environment. | Power Automate – Introduction – RPA Help |
1.1 Service account #
You should consider having a service account for your environment that has the role of system administrator (gives additional access to view all desktop flows in the environment, even though they are not shared with the account) , regardless of whether it is a small or large team. This creates problems when a user who owns flows , connections , etc. is deleted, for example when changing jobs. If the accident happens, it is however possible to continue to have access to flows through the administration panel. . Connections however, they must be recreated before they can be used by a flow again.
For this reason, you should create your connections on a service account, which you can then create connection references to, so that others can use them in solutions . Furthermore, it will be from the service account that you can update your connections in the future. Any user libraries or anything else that is reusable between developers can also be made co-owner of the service account. This means that it automatically gets ownership if the owner is deleted sometime.
2. Grant of license #
If you use Azure Active Directory, you can assign the license to the developer’s user from the admin center .

3. Power Automate environment permissions #
A 365 administrator will initially need to grant access to the person who will manage the environment.
This is done by logging into Power Automate – https://make.powerautomate.com/
Click on the gear in the top right, and then Admin Center .

Under Environments, check the box next to Default , and then Settings.

Under Users + permissions, select Users .

Find the user who should be the administrator, press the three dots and select Manage Security Roles , check Basic User , Environment Maker, Project User and System Administrator and then click Save . Click Update User . It usually takes a few minutes for it to be synchronized and take effect.


4. Creation of production environment #
Continue in the Admin Center under Environments, press + New , fill out the form and set Type to Production , and then Save.

Back in Power Automate, after a few minutes we can switch to our new environment in the top right.

5. Adding machines (PCs/VMs) to the environment #
Log in to the machine in question and install Power Automate Desktop , making sure the following is checked.

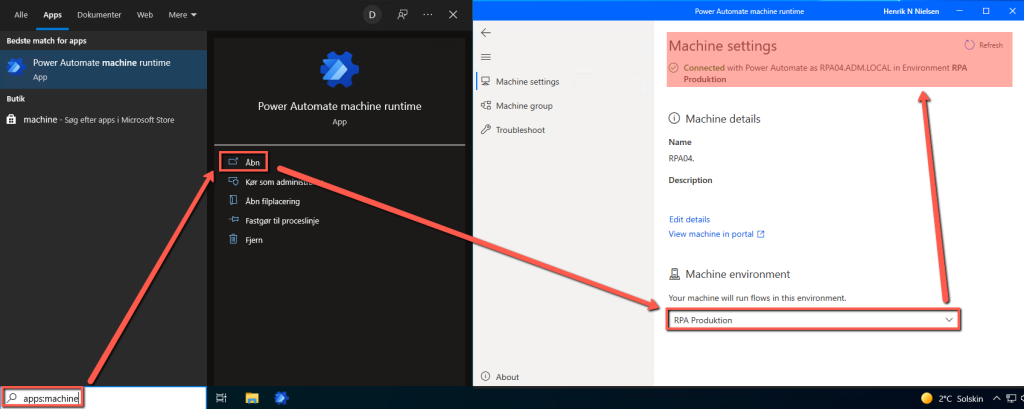
After installation, run apps:machine runtime . The first time you will be prompted to select an environment, and from now on you can view the status from here on the machine.


