1. Introduction #
It can be difficult to describe what a cloud flow is, as there are an infinite number of things you can do with them. Basically, you can see them as being the backbone of all automation in Power Automate . All automation in Power Automate is controlled with a cloud flow , whether it only touches the O365 package, for example, or with RPA via unattended execution of Desktop flows .
There is a lot of functionality for working between O365 apps , however, it will not be described in this section, as only the RPA part is being looked at.
2. Cloud flow template for desktop flow #
You need a cloud flow to run desktop flows unattended. Alternatively, you can run them attended. However, this requires that you log in to a machine, open Power Automate Desktop, and start your desktop flow each time. The following describes how to create a Scheduled cloud flow , which activates at specific times automatically. It might be a good idea to create a similar Instant cloud flow , as you may also have processes that require a manual start from time to time.
Under My Flows – New Flow select Scheduled cloud flow .

Call it something sensible, and just repeat it once a year. We will later change this to the individual processes to suit.

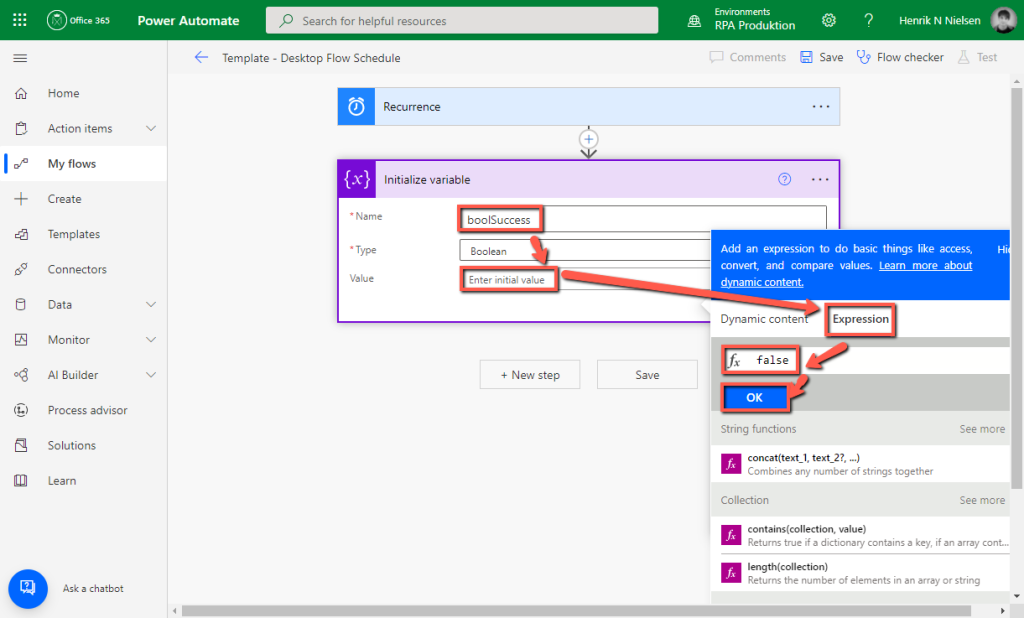
Press New step , and find an Initialize variable and insert it. Fill it in as shown, right click on it , Rename it and call it boolSuccess . We will use this for exception handling later.
New step and search for Scope . Inside this insert a Run a flow built with Power Automate for desktop , which is used to run processes. Fill this with an empty desktop flow if necessary, and run mode as Unattended, the flow cannot be saved to the end otherwise. Furthermore, insert a Set variable where our previous one is set to true under expression . Rename this if necessary to Try – Run Desktop Flow .

Insert a new Scope , and optionally rename it to Catch – Error Handling . Press the 3 dots and select Configure run after .

Since this should only run if our process fails during execution, we check the box as shown. If the process does not fail, it will automatically skip this part of the flow.

If the process fails, you can choose what to do in this scope . Maybe it should just run again, send an email to the process owner and RPA manager, etc. In this case, it sends a Teams chat message to the RPA manager’s Teams group, and informs that the process has failed, and where. As previously, we refer marked in purple to the name of our Run Desktop action, and then we pull out the process error message .

The messages in the Teams channel may look like this. If you use more than one bot, the message will come from the bot that ran the process.

Finally, another Scope is inserted, in this one a condition is created that checks whether our process ran or not. From this, you can choose what should happen in both cases. It will again be up to you how you want to control what should happen immediately, and you can change it from process to process.
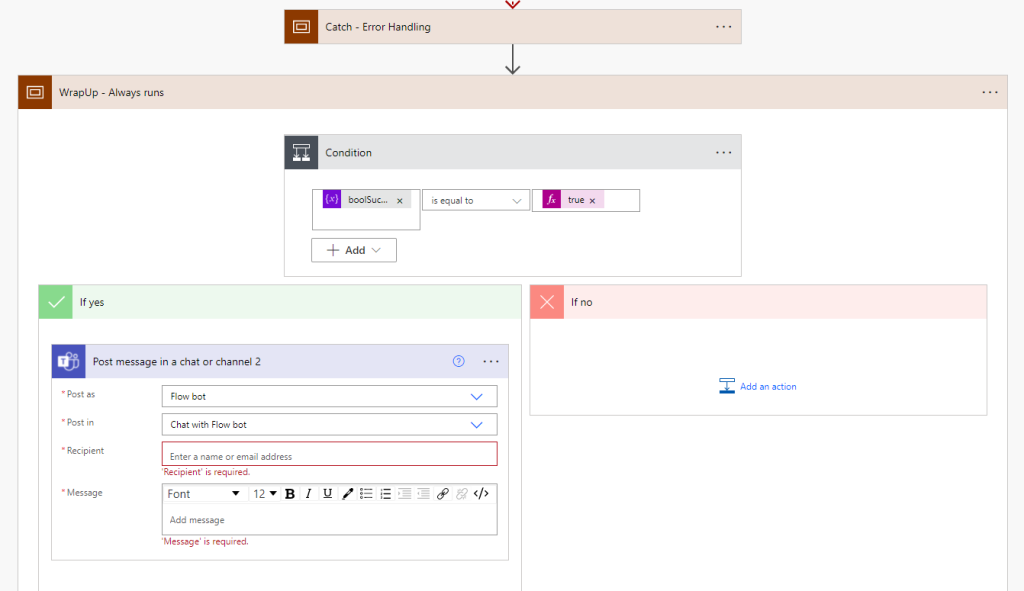
Then another configure run after is done on the new scope, so that it always runs no matter what.

In the end we have something like this, press Save , and wait for the following message to appear at the top.

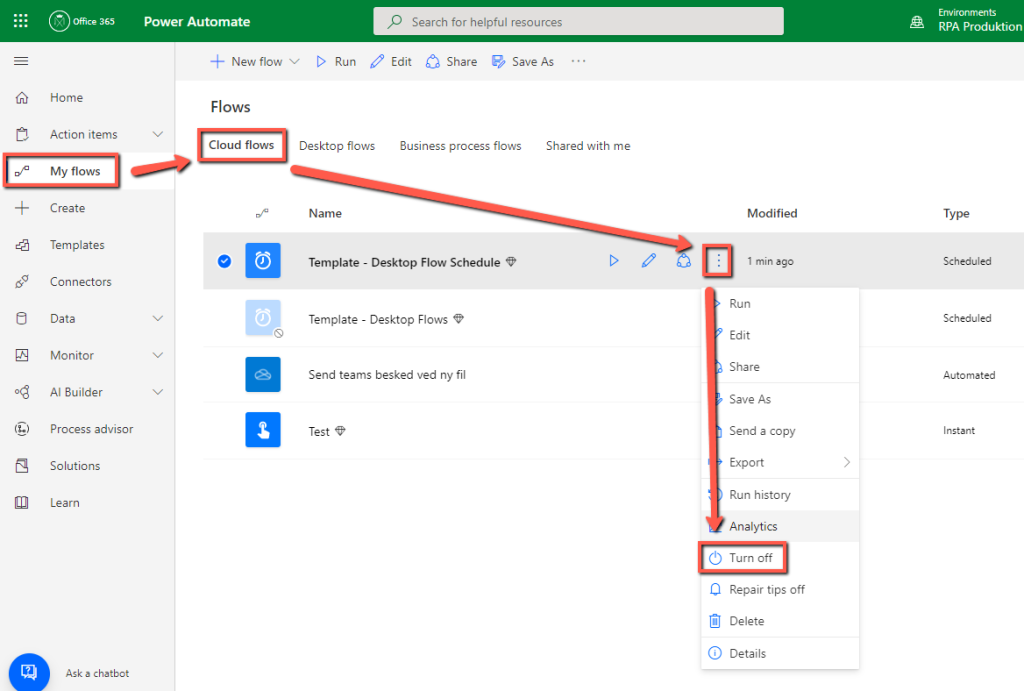
Back in My flows – Cloud flows we can tap the dots and select Turn off , which means the flow will not start and run on the selected schedule. Since this is a template, this is a good idea.
Due to bugs, it doesn’t always work to do a Save As of the template, as these are not always visible in Solutions when you try to add them . It’s easier to create a new Cloud flow directly in your solution , and then copy the parts from the template over. It’s easiest to have two windows open, one with your template and one with the new cloud flow .
Under New – Automation – Cloud flow, select the one you need.

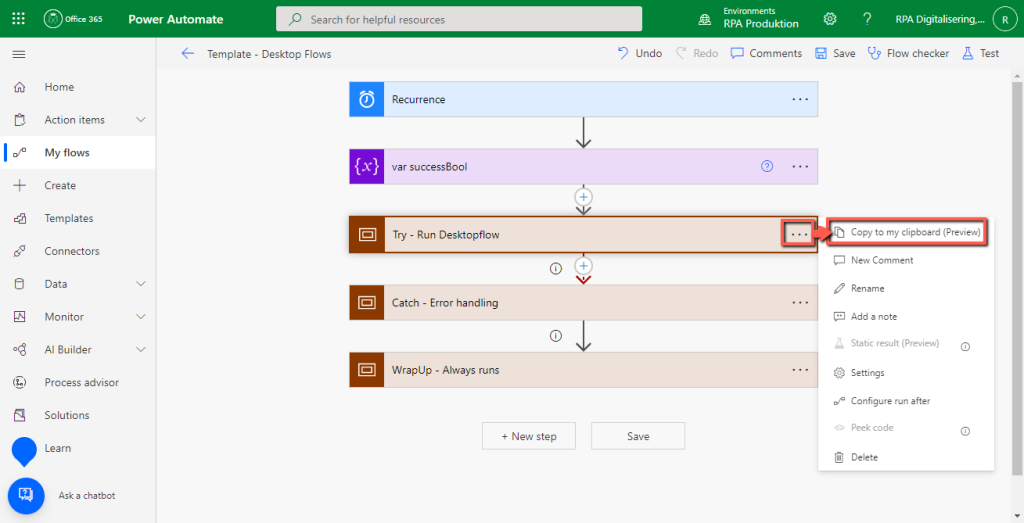
Open the template in another window, and from each part we want to copy, we click on the three dots and then Copy to my clipboard (Preview) .
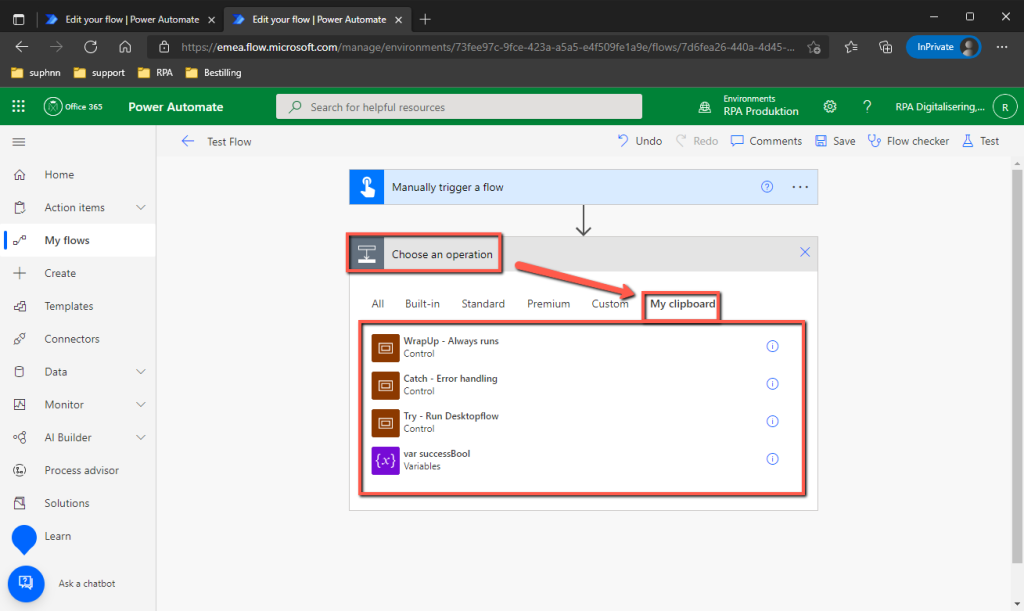
Back in our new cloud flow , press New step , and under My clipboard you will find the parts we previously copied.
If you have configured a Run-After similar to the example, this will not be copied over and must be created again.


