1. Introduction #
SQL can be used in many RPA contexts, both to retrieve data and possibly log data from runs. Below are resources to study it further.
| Name | Note | Link |
| Course | Free course with assignments for SQL | SQL Tutorial (w3schools.com) |
| Sandbox environment | A practice tool with an environment you can test in | SQL Tryit Editor v1.6 (w3schools.com) |
| SQL Keywords | Keywords | SQL Keywords Reference (w3schools.com) |
| SQL Constraints | Constraints | https://www.w3schools.com/sql/sql_constraints.asp |
| SQL Wildcards | Wildcards | https://www.w3schools.com/sql/sql_wildcards.asp |
| SQL Data Types | Data Types | https://www.w3schools.com/sql/sql_datatypes.asp |
2. ACEOLEDB – Use SQL statements for Excel and CSV files #
In larger data sets in Excel with 10000+ rows, it can be easier to use SQL statements to access an Excel sheet as a database, and use SQL Query to extract data. It can also be a good alternative if you need to extract specific data, instead of going through each row individually.
| Name | Note | Link |
| Open SQL connection to an Excel file | Review of how to use this functionality in Power Automate Desktop. | https://learn.microsoft.com/en-us/power-automate/desktop-flows/how-to/sql-queries-excel |
| Access Database Engine | Link to download, select the same bit version as the installed office package user. | https://www.microsoft.com/en-us/download/details.aspx?id=54920 |
| 32-bit/64-bit mixed installations | In cases where you use 32-bit office and for example Power Automate (running 64-bit) you need to do the following to be able to use the solution. Note that you can subsequently add the sources from ODBC 32-bit, and add both 32/64 bit. | https://learn.microsoft.com/en-us/troubleshoot/power-platform/power-automate/desktop-flows/cannot-connect-access-database-engine-ole-db?source=recommendations |
| Office Click2Run | Troubleshooting and possible solution to the problem. | https://learn.microsoft.com/en-us/office/troubleshoot/access/cannot-use-odbc-or-oledb |
| schema.ini | Introduction to schema.ini files and how to set them up | https://learn.microsoft.com/en-us/sql/odbc/microsoft/schema-ini-file-text-file-driver?view=sql-server-ver15 |
| Extended properties HDR and IMEX | If you use both HDR and IMEX in your Extended Properties , it can cause problems. This is explained in the link, with a possible solution. | https://stackoverflow.com/questions/10102149/what-is-imex-within-oledb-connection-strings |
2.1 Installing ODBC sources #
If you do not have Microsoft Access installed or have this option, you can download an Access Database Engine installation instead. This is done as a quiet install via CMD prompt.
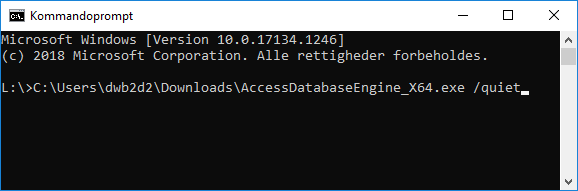
Afterwards, you can verify the installation via ODBC Data Sources or alternatively via Powershell cmd:
(New-Object system.data.oledb.oledbenumerator).GetElements() | select SOURCES_NAME, SOURCES_DESCRIPTION
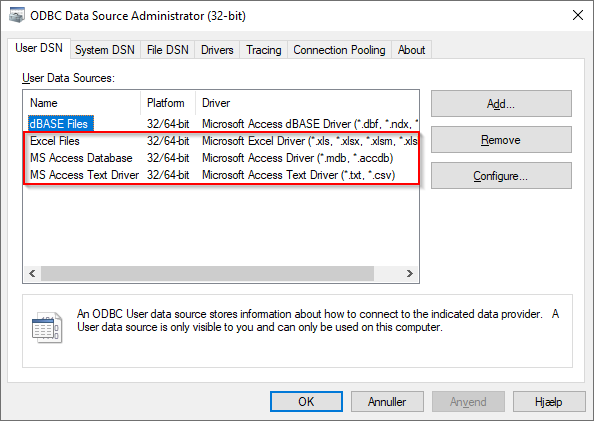
If they are not in the list, you can try setting them up manually. Find them under Add… and add them.
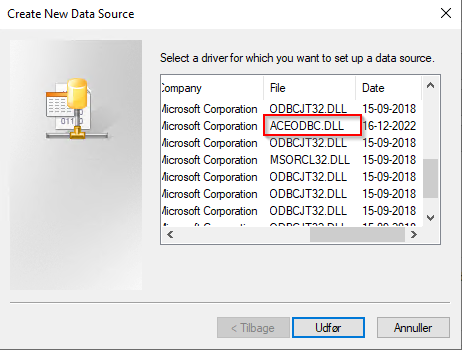
Since there are several sources for the same file types, make sure you choose the one where under File it says ACEODC.DLL.
2.2 Excel files #
With Excel files, you connect to this as a database, and each sheet in the file is considered a table from which you can pull data. An example of a ConnectionString might look like this – Provider=Microsoft.ACE.OLEDB.16.0;Data Source=C:\TEMP\Test.xlsx;Extended Properties=”Excel 12.0 xml;HDR=YES;”;
| ConnectionString | Contents | Note |
| Provider | Microsoft.ACE.OLEDB.16.0; | The version of ACEOBC you are using, with 16 being the latest. You can also use 12 and 14 in some cases. |
| Data Source | C:\TEMP\Test.xlsx; | Full file path to the Excel sheet |
| Extended Properties | “Excel 12.0 xml;HDR=YES”; | The properties that will help with loading the sheet, see below for explanation. |
| EP – File type | .xls files – “Excel 8.0” .xlsb files – “Excel 12.0” .xlsm files – “Excel 12.0 Macro” .xlsx files – “Excel 12.0 Xml” | Depending on which Excel file type is to be loaded, you must select the correct type. This must always be filled in. |
| EP – Column Names | “HDR=YES” “HDR=NO” | Determines whether the first row contains column headings and not data. If NO is selected, the columns will be auto-numbered from the left as F1 – F2 – F3, etc.* |
| EP – IMEX | “IMEX-1” | Makes the driver always read columns with mixed data types ( int, string, datetime, etc. ) as text. Note that this property can cause problems with writing back to the sheet. |
| SQL query example | SELECT * FROM[Ark1$] WHERE[ADRESSERINGSNAVN_1] = “Esbjerg Municipality” | Note that $ in[Ark1$] means excel sheet, not column name. |
* Example with HDR=NO
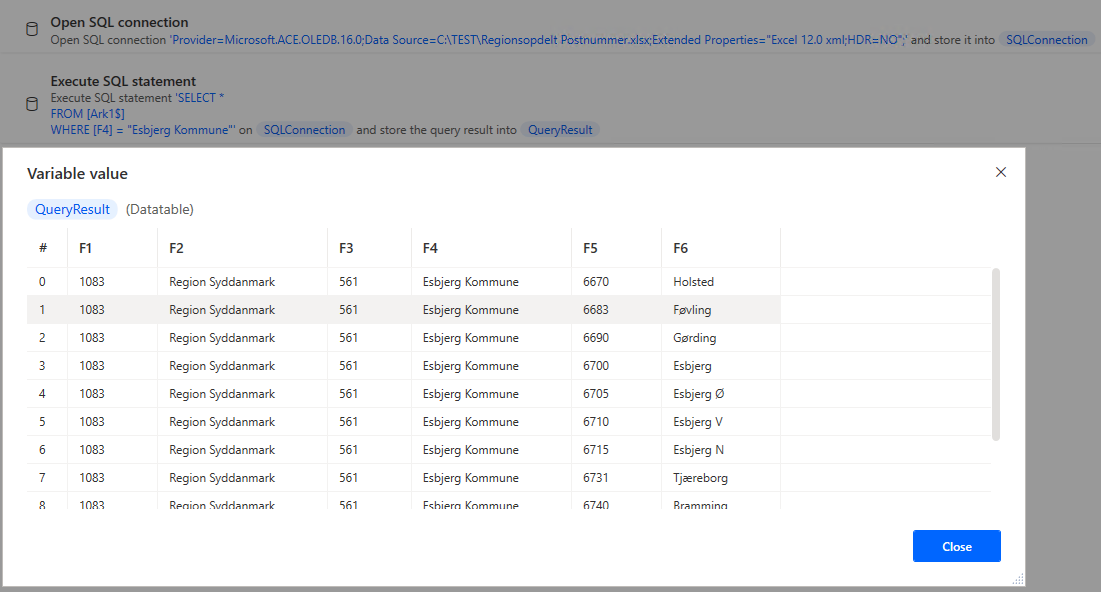
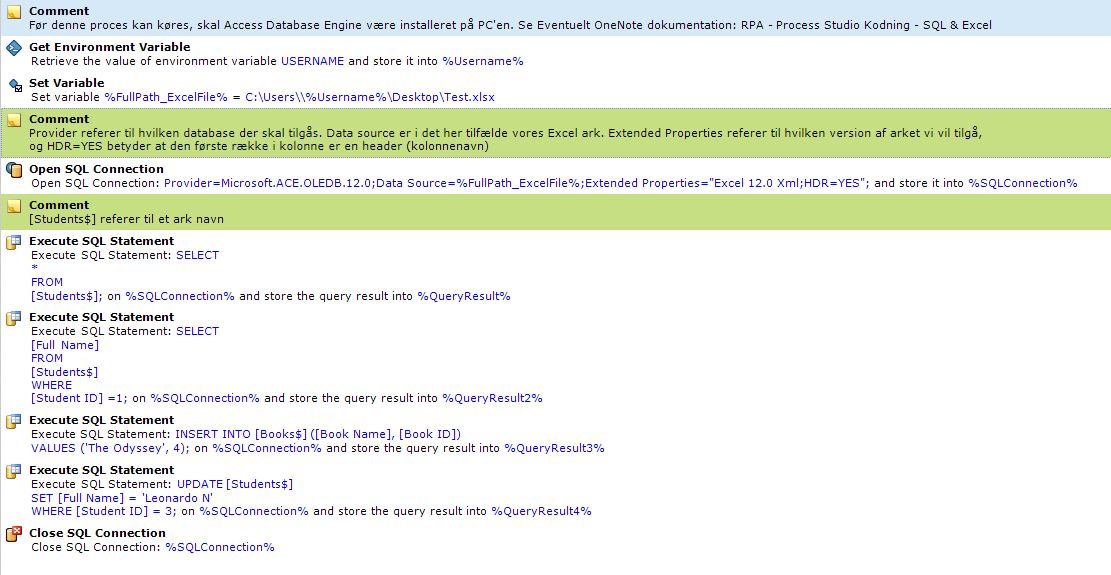
The code in its simplicity will look like this, and after Open SQL Connection , you can make regular queries via Execute SQL Statement as needed.
The image is from the discontinued Softomotive ProcessRobot, which was later acquired by Power Automate Desktop .
2.3 CSV and txt files #
For CSV and txt files, you connect to the folder as a database, and each file in this is considered a table. If you want to read CSV files, you must use a schema.ini file in the same folder as the CSV files. The connection string will look like this – Provider=Microsoft.ACE.OLEDB.16.0;Data Source=C:\TEST\;Extended Properties=”Text”;
| ConnectionString | Contents | Note |
| Provider | Microsoft.ACE.OLEDB.16.0; | The version of ACEOBC you are using, with 16 being the latest. You can also use 12 and 14 in some cases. |
| Data Source | C:\TEMP\; | Path to the folder where the CSV/txt files are located |
| Extended Properties | “Text”; | This will always be Text only, as it is the schema.ini file that tells the driver how the individual CSV file should be loaded. |
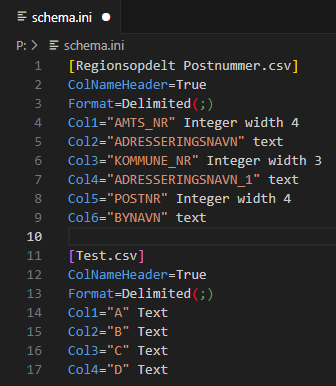
| schema.ini | [Regionsopdelt Postnummer.csv] ColNameHeader=True Format=Delimited(;) Col1=”AMTS_NR” Integer width 4 Col2=”ADRESSINGNAME” text Col3=”MUNICIPALITY_NR” Integer width 3 Col4=”ADRESSINGNAME_1″ text Col5=”POSTCODE” Integer width 4 Col6=”TOWNNAME” text | File name and extension First line contains column headings CSV delimiter ; Col1=” Column name ” data type width character-length Note that the Column Name must match what is in the file. |
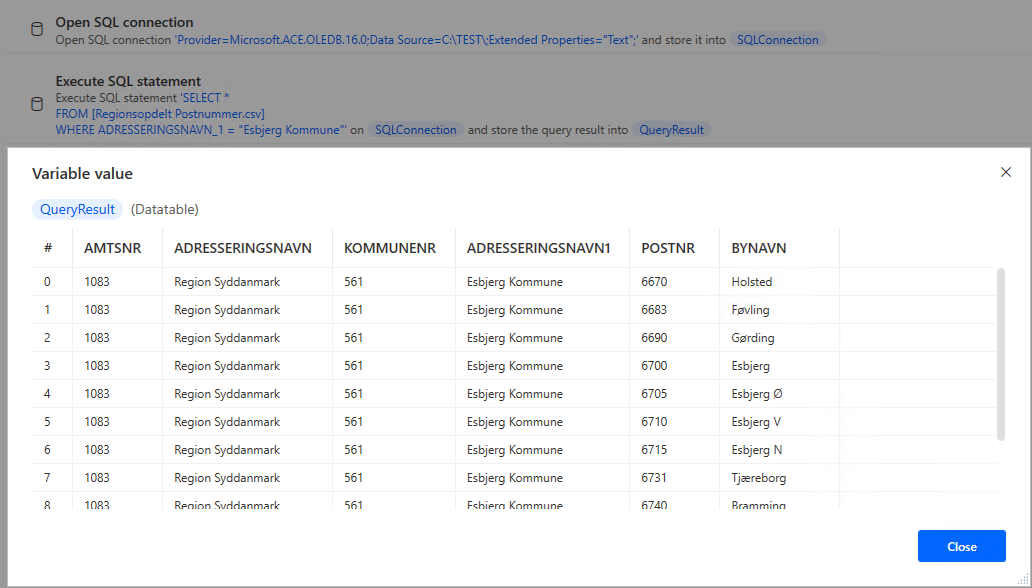
| SQL query example | SELECT * FROM[Regionsopdelt Postnummer.csv] WHERE[ADRESSERINGSNAVN_1] = “Esbjerg Municipality” | This refers specifically to the csv file (table) that must be read from. |
As shown here, the schema.ini file is located together with the CSV files that are used.

For each CSV file that needs to be loaded, a section must be filled in the schema.ini file.
In Power Automate Desktop, the end result might look like this, for example.
3. Practice with RPA #
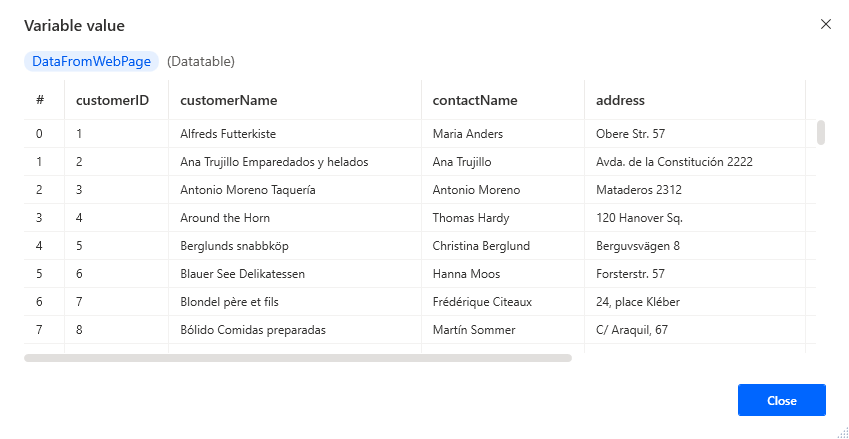
It can be difficult to practice RPA in collaboration with SQL if you do not have access to create a database and tables yourself. In interaction with W3schools sandbox you can practice SQL queries, and extract the result into a data table with RPA for further practice. This can be, for example, for loops or data extraction to be inserted into Excel / Word.
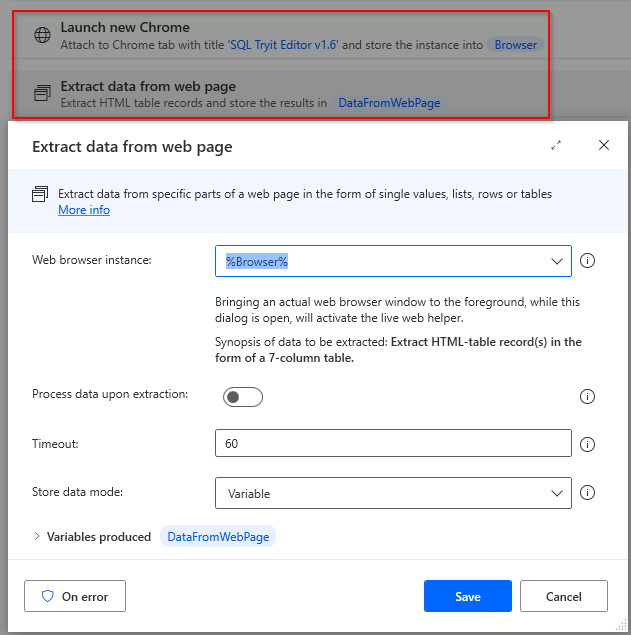
In Power Automate Desktop, this is done by attaching to the Chrome tab, and then running an Extract data from webpage .
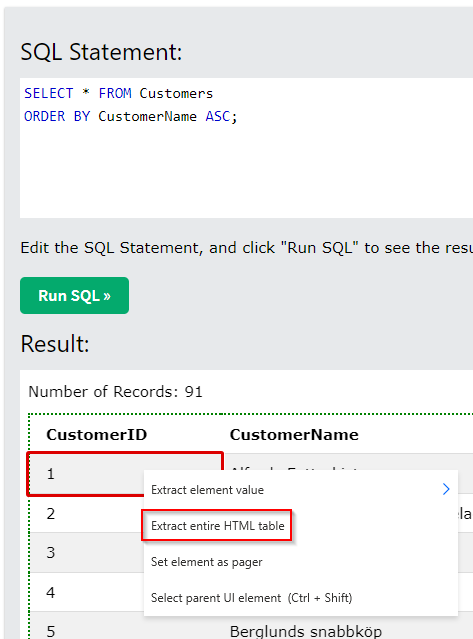
While the above window is open, you can right-click on any cell in the table and select Extract entire HTML table .
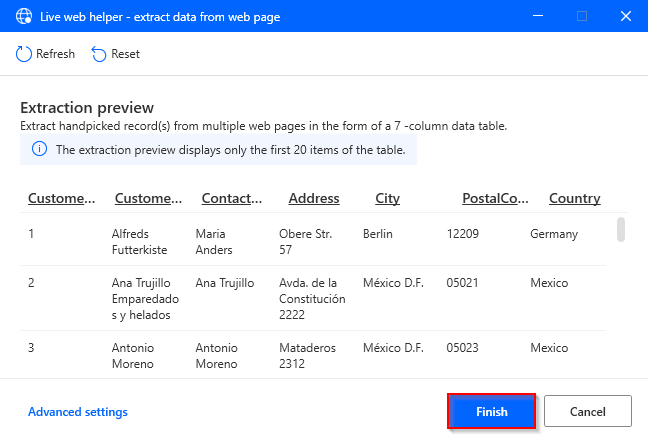
In Live web helper it should look like this afterwards, then press Finish .
The result after the code is run looks like this.